Updated on September 4, 2019
Before you get your hands on the latest iPhone (on the best network!) make sure you back up your current device. Backing up your information before coming into the store for an upgrade is the best way to ensure all your photos, files, and contacts make it to your new device.
There are two main ways to back up your Apple devices: iCloud or iTunes. We’ll break down each option so you can decide which is best for you and your iPhone, iPad or Apple Watch.
Want to upgrade to the newest iPhone or add an iPad or Apple Watch to your plan? Visit your nearest Cellular Sales store to see our latest deals!
Backing up your Apple device with iCloud
When backing up your iOS devices with iCloud, you don’t need to be plugged into a computer or be at home. You can securely back up your devices using any Wi-Fi connection, and your first 5GB of cloud storage are completely free through Apple. Plus, your backups are always encrypted, so your information is safe and secure.
- First, connect your device to a Wi-Fi network. It’s important that your device stays connected to the Internet throughout the entire backup process.
- Then, go to Settings > [your name], and tap iCloud. *If you’re using iOS 10.2 or earlier, go to Settings, then scroll down and tap iCloud.
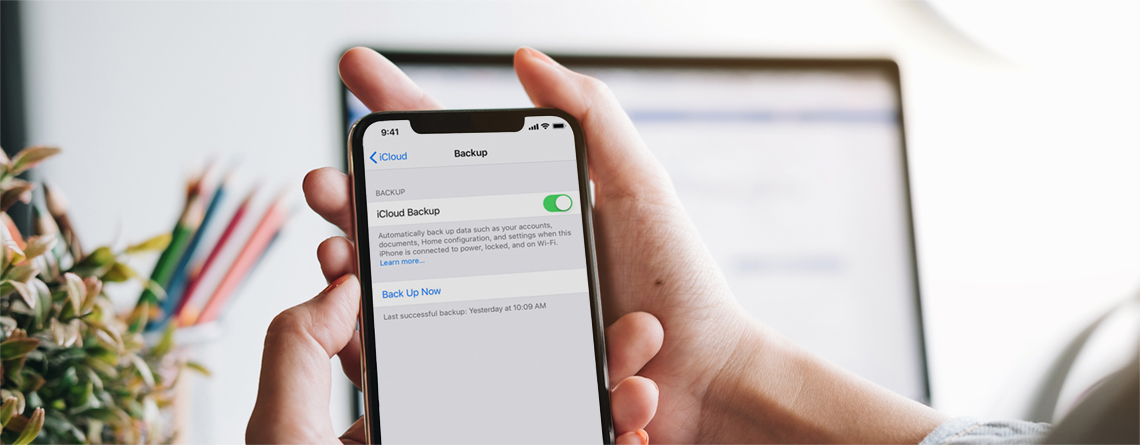
- Tap iCloud Backup. *If you’re using iOS 10.2 or earlier, tap Backup. Make sure that iCloud Backup is turned on.
- Tap Back Up Now. Remember to stay connected to your Wi-Fi network until the process completes.
To make sure that the backup was successfully completed:
Go to Settings > [your name] > iCloud > iCloud Backup. Under Back Up Now, you’ll see the date and time of your last backup.
*If you’re using iOS 10.2 or earlier, go to Settings > iCloud > Storage > Manage Storage, then select your device. The backup should appear in the details with the time and backup size.
Automatically backing up your Apple device with iCloud
Once your first backup has been completed, iCloud can automatically back up your device each day after that. New photos, contacts, and other information that you’ve added to your device will be included in each new backup. Follow these steps to turn on automatic iCloud backups:
- Make sure that iCloud Backup is turned on in Settings > [your name] > iCloud > iCloud Backup.
*If you’re using iOS 10.2 or earlier, go to Settings > iCloud > Backup. - Connect your device to a power source.
- Connect your device to a Wi-Fi network.
- Make sure your device’s screen is locked.
- Check that you have enough available space in iCloud for the backup. You automatically get 5GB of storage for free, but higher storage plans up to 2TB can be purchased through Apple.
Backing up your Apple device with iTunes
Backing up your Apple devices with iTunes allows you to save your backups using the storage on your computer. Encryption is turned off by default, but can easily be turned on. Here’s how you back up your devices using iTunes:
- Make sure you’re running the latest version of iTunes.
- Open iTunes and connect your device to your computer using the appropriate USB cable.
- If a message asks for your device passcode or to Trust This Computer, follow the onscreen steps.
- Select your connected device when it appears in iTunes. If your device doesn’t appear in iTunes, check out this Apple support page.
- If you want to save Health and Activity data from your smartphone or Apple Watch, you’ll need to encrypt your backup: Select the box called Encrypt [device] backup and create a password. However, you can create a backup that isn’t encrypted if you don’t need to save your Health and Activity data. Just click Back Up Now.
- When the backup process ends, you can see if the backup finished successfully on the Summary screen in iTunes. You’ll see the date and time under Latest Backup.
Transferring Data to a New Device
If you already have a backup created for your old device, you can use Quick Start to quickly transfer your data from one device to another. To use Quick Start, both devices must be running iOS 11 or later.
*If you have an Apple Watch and you got a new iPhone, unpair your Apple Watch from your previous iPhone before you set up your new device. Unpairing automatically backs up your Apple Watch so you can restore it after you pair with a new iPhone.
Quick Start also offers the option of using iPhone migration if you’re setting up a new iPhone using your current iPhone and both devices are running iOS 12.4 or later. This allows you to transfer all your data wirelessly from your current iPhone to your new one. You can also connect the devices together if the wireless network that you’re using is slow or congested.
Keep in mind that Quick Start occupies both devices, so make sure you won’t need to use your current device for a while before you start the transfer process.
How to Use Quick Start
Turn on your new device and place it near your current device. The Quick Start screen will appear on your current device and offer the option of using your Apple ID to set up your new device. Make sure that it’s the Apple ID that you want to use, then tap Continue. If you don’t see the option to continue, make sure that Bluetooth is turned on.
Wait for an animation to appear on your new device. Hold your current device over the new device, then center the animation in the viewfinder. Wait for a message that says Finish on New [Device]. If you can’t use your current device’s camera, tap Authenticate Manually, then follow the steps that appear.
When prompted, enter your current device’s passcode on your new device.
Follow the instructions to set up Face ID or Touch ID on your new device.
When prompted, enter your Apple ID password on your new device. If you have multiple devices, you might also need to enter their passcodes.
Your new device offers the choice of restoring apps, data, and settings from your most recent iCloud backup, or updating your current device’s backup and then restoring. After you select a backup, you can choose whether to transfer some settings related to location, privacy, Apple Pay, and Siri. If you want to update the backup on your device, make sure that Wi-Fi is enabled.
If you have an Apple Watch and you’re setting up a new iPhone, you’ll also be asked if you’d like to transfer your Apple Watch data and settings.
How to Use iPhone Migration
If your current iPhone and new iPhone are both running iOS 12.4 or later, you can use iPhone migration to transfer data directly from your previous device to your new one.
If you want to migrate your data wirelessly, just keep your previous iPhone near your new one throughout the process as you follow the steps below. Make sure to keep both devices connected to power.
To migrate your data through a wired connection, you’ll need a Lightning to USB 3 Camera Adapter and a Lightning to USB Cable. Connect the Lightning to USB 3 Camera Adapter to your current iPhone, then plug the Lightning to USB Cable in to your new your iPhone and connect the other end to the adapter. Connect the Lightning to USB 3 Camera Adapter to power through its Lightning port, then follow the steps below.
Turn on your new iPhone and place it near your current iPhone. If you’re migrating your data via wired connection, connect the devices. The Quick Start screen will appear on your current iPhone and offer the option of using your Apple ID to set up your new iPhone. Make sure that it’s the Apple ID that you want to use, then tap Continue. If you don’t see the option to continue on your current device, make sure that Bluetooth is turned on.
Wait for an animation to appear on your new iPhone. Hold your current iPhone over the new iPhone, then center the animation in the viewfinder. Wait for a message that says Finish on New iPhone. If you can’t use your current iPhone camera, tap Authenticate Manually, then follow the steps that appear.
When prompted, enter your current iPhone passcode on your new iPhone.
Follow the instructions to set up Face ID or Touch ID on your new iPhone.
Tap Transfer from iPhone to begin transferring your data from your previous iPhone to your new iPhone. You can also choose whether to transfer some settings, such as Apple Pay and Siri, from your previous iPhone to your new iPhone.
If you have an Apple Watch and you’re setting up a new iPhone, it will ask if you’d like to transfer your Apple Watch data and settings.
Keep your devices near each other and plugged in to power until the iPhone data migration process is complete. Transfer times vary based on the connection type that you’re using, network conditions, and the amount of data transferred.
After you transfer to your new iOS device, you might need to finish setting up a few more things. If you run into any issues or just have some questions, our wireless sales consultants are always here to help! Swing by your nearest Cellular Sales store to receive personalized, one-on-one support anytime you need it.